

Hosting a lovely Mother’s Day brunch or just dreaming of a relaxed Sunday where you aren’t chained to the stove? I totally get it. That’s why the secret weapon in my repertoire is these amazing, reliable mini quiches. They are the definition of prep-ahead elegance! You make them once, and suddenly, you look like a dessert-party genius later. When I first started One Dish Universe, I looked at how busy life gets—just like Elena Valdez did consulting for years—and knew we needed simple solutions that deliver big flavor. These little bites, with their perfectly flaky crust, are the answer to stress-free hosting, every single time. You can read more about our philosophy of simple, delicious living on our About page.
- Why You Will Love These Prep-Ahead Elegance Mini Quiches
- The Essential Ingredients for Perfect Mini Quiches
- Crafting the Flaky Crust for Your Muffin Tin Quiches
- Assembling the Spring-Forward Fillings for Your Mini Quiches
- Step-by-Step Instructions for Baking Your Mini Quiches
- Make Ahead Breakfast and Storage Tips for Mini Quiches
- Tips for Success When Making Muffin Tin Quiches
- Frequently Asked Questions About These Mini Quiches
- Estimated Nutritional Information for Your Mini Quiches
Why You Will Love These Prep-Ahead Elegance Mini Quiches
Listen, I bake these all the time, and honestly, the best part isn’t even the gorgeous presentation. It’s the fact that I made them yesterday! When you’re planning a gorgeous garden tea party or just trying to relax during a Sunday reset, you don’t want kitchen sweat. Here’s why these little bites are total game-changers:
- They are genuinely built for the future! You can bake them completely, let them cool, and keep them ready in the fridge for brunch food for a tea party later on. Total zero-stress hosting right there.
- That crust? Oh, that beautiful, flaky crust doesn’t deflate or get soggy when you prep it right. It holds up perfectly, which is just divine for something you want to eat cold or reheated slightly.
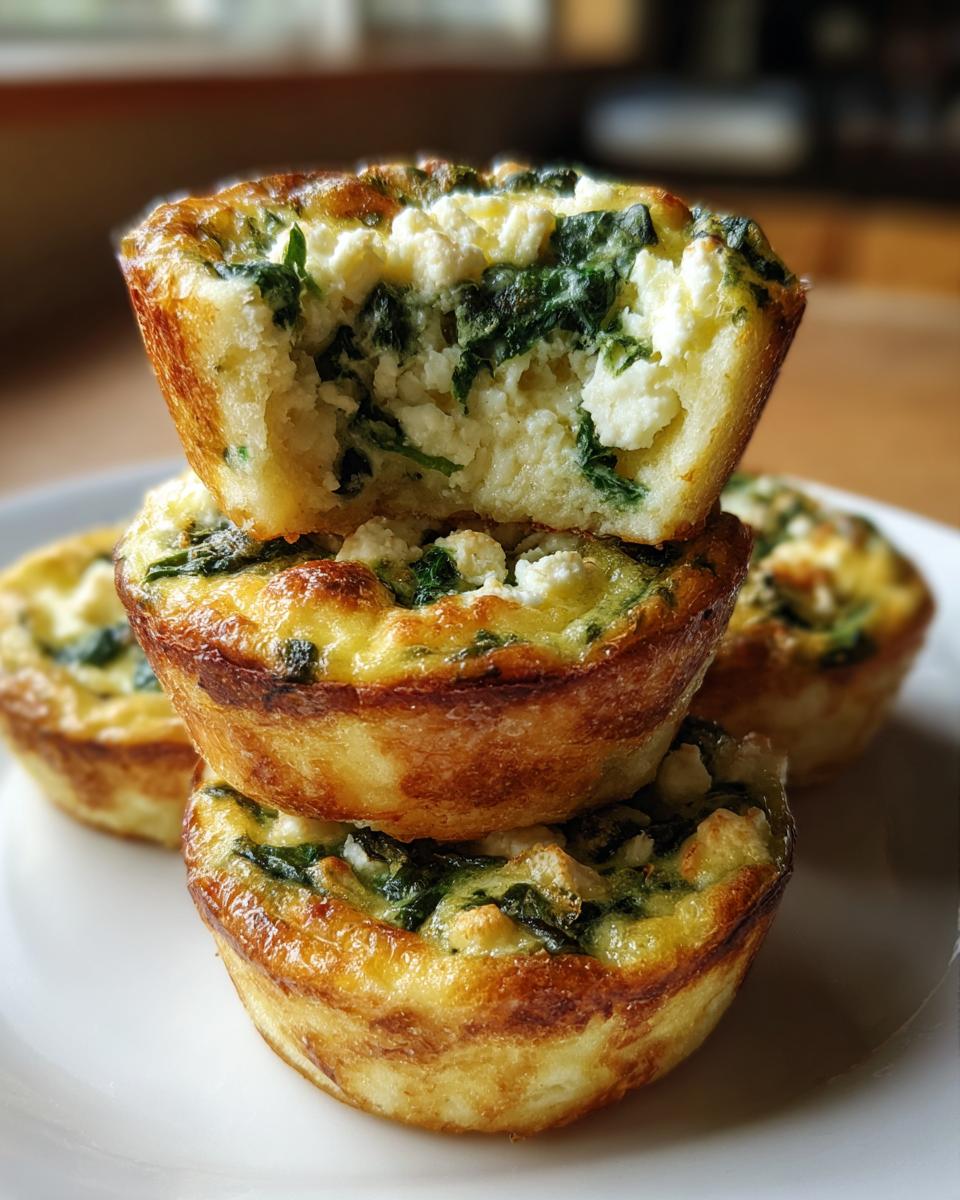
- The fillings are pure spring! We’re using fresh spinach and bright leeks, making them feel special without requiring heavy sauces or complicated steps.
- They are portion-perfect! Everyone gets their own little masterpiece. No awkward slicing or worrying about uneven pieces.
- They cover all the bases! They work perfectly as light appetizers when guests first arrive or as a substantial, easy make ahead breakfast option.
- You save time on the actual event day. Since the blind baking and filling happen beforehand, you just pop them in to finish when it’s showtime!
The Essential Ingredients for Perfect Mini Quiches
Remember how Nona always insisted that the quality of what you put *in* the food matters more than how fancy the final dish looks? That wisdom shines here. For these little beauties, we’re keeping things simple, but we absolutely need the right players. Trust me, don’t skip the cold butter step for the crust—that’s where the magic happens! We are using real, genuine ingredients that give us that elegant result without any fuss.
Here is what you absolutely need to gather up for the crust and that lovely, creamy filling:
- 1 1/4 cups all-purpose flour
- 1/2 teaspoon salt
- 1/2 cup (1 stick) cold unsalted butter, cut into small pieces
- 3 tablespoons ice water
- 4 large eggs
- 1/2 cup heavy cream
- 1/4 teaspoon ground nutmeg
- 1/2 cup chopped fresh spinach
- 1/4 cup sliced leeks, white and light green parts only
- 1/4 cup crumbled feta cheese
- 1/4 cup shredded Gruyère cheese
- Pinch of black pepper
That combination of creamy Gruyère with the salty feta makes these amazing **spinach and feta appetizers**. Everything should be ready to go before we even think about dough!
Crafting the Flaky Crust for Your Muffin Tin Quiches
Okay, if you want those utterly perfect **mini quiches** that look like they came from a fancy bakery, you have to respect the dough. This isn’t the time to rush! The secret to real flakiness is keeping everything—and I mean *everything*—ice cold. When that cold butter hits the heat of the oven, it creates steam pockets, and those pockets are what give you those lovely shatteringly crisp layers.
Grab your flour and salt first. Now, you need to cut that cold butter into the flour. I use my pastry blender, but honestly, if you just use your fingertips really fast, that works too. You’re looking for pieces about the size of small peas. Don’t overwork it into sand! Once you add the ice water, mix just until the dough decides to behave and form a shaggy ball. Wrap it up tight so it doesn’t dry out, and pop it into the fridge for a solid 30 minutes. This chill time firms up the butter again, which is non-negotiable for a crisp base.
Tips for Perfect Blind Baking Your Mini Quiche Crusts
This step is what separates the triumphant host from the one serving slightly soggy bottoms! Once your dough is rolled thin and settled into the muffin tin—remember to prick them with a fork—we blind bake. This pre-bake sets the structure so the egg custard doesn’t soak through while it’s cooking.
Set your oven to 375 degrees Fahrenheit. Bake those little shells for 10 minutes, uncovered. I usually watch them; you just want them to look dry and just barely starting to set at the edges. Nothing too browned yet! Pull them out, and now they are ready to handle the fillings. This little bit of extra work is crucial for making sure your **mini quiches** are perfect!
Assembling the Spring-Forward Fillings for Your Mini Quiches
With those gorgeous crusts waiting patiently, we jump right into the fun part: mixing up the creamy, savory fillings! First things first, take those delicate leeks and sauté them until they are super soft. This wakes up their flavor and gets rid of any harshness. Only about three minutes in a little bit of oil or butter—just until they look slightly wilted.
While those cool down, it’s time for the custard base. Grab a bowl and whisk your four eggs, the heavy cream, that tiny pinch of nutmeg (it makes such a difference!), and some black pepper. Whisk it until it’s totally combined and slightly frothy. Not too much, we don’t want huge bubbles.
Now we build those layers inside the pre-baked cups! Divide your fresh spinach, the soft leeks, the feta, and the Gruyère evenly among the 12 cups. Make sure everything is spread out nicely so every bite is balanced. These layered **spinach and feta appetizers** are going to be fantastic. Pour the creamy egg mixture over the top gently, but don’t fill them all the way up—remember to leave a little room for expansion when baking!
Step-by-Step Instructions for Baking Your Mini Quiches
Okay, the oven is hot, the fillings are divided, and those crusts are blind-baked and waiting—it’s time for the final event! This is where we turn those prepped components into edible gold. Speed and caution are key here; we want to keep that wonderful custard warm but need to handle the muffin tin carefully.
Once you’ve layered your spinach, leeks, and cheeses into the 12 pre-baked shells, gently pour in that egg mixture. Remember I said three-quarters full? That’s important! If you overfill, you’ll have custard run-off, and nobody wants to scrub burnt egg from their muffin tin!
- Carefully place the filled muffin tin back into the 375-degree oven.
- Bake them for approximately 18 to 22 minutes. This time goes fast, so watch them closely after the 18-minute mark.
- You are looking for the tops to turn that lovely light golden color, and the centers need to look completely set, not wobbly at all.
Achieving the Right Set When Baking Mini Quiche Lorraine
Whether you are making this spinach quiche or a classic **mini quiche Lorraine**, testing for doneness is the same vital step. You don’t want them rubbery! After the 18 minutes, gently wiggle the pan. If the very center jiggles like Jell-O, give it another minute or two. If it just shimmers slightly but doesn’t move when you nudge the tin, they’re done!
The absolutely necessary final step? Don’t try to yank them out immediately! Let those beautiful **mini quiches** rest in the tin for a full five minutes. This allows the structure to firm up one last time. If you try to lift them too soon, they might crack or collapse. After that short rest, use a tiny offset spatula or butter knife around the edge, and gently lift them out onto a wire rack to finish cooling fully.
Make Ahead Breakfast and Storage Tips for Mini Quiches
This is my favorite part, honestly, because this is where the stress truly melts away! Remember how I promised you prep-ahead elegance? Well, these little guys are your best friend for that. Once the **mini quiches** are completely cool—and I mean totally cool—you can treat them like gold!
For a spectacular **make ahead breakfast** situation, tuck them into an airtight container and chill them in the fridge for up to two whole days. They hold up beautifully. When Sunday morning rolls around, you just pop them back into a low oven to warm through for about 10 minutes. They taste almost as good as fresh!
If you’re planning a lovely **brunch food for tea party** gathering, bake them the day before, serve them warm or even at room temperature. The flaky crust stays stellar, and the fillings—spinach and feta—are fantastic served cool. It lets you spend your morning setting out the pretty teacups instead of messing with the oven!
Tips for Success When Making Muffin Tin Quiches
Listen, I’ve made enough of these **muffin tin quiches** to know exactly where things can go sideways. It’s like Nona always said, a good cook anticipates the hiccups! Since you’ve already got the flaky crust down pat from the chilling and blind-baking steps, let’s talk about the final assembly and bake to guarantee perfection.
Here are a few quick tips based on my years in professional kitchens and bustling home life:
- Don’t Skip the Prick: When you’re sitting those dough circles in the tin, use a fork and give the bottom a good prick all over. This lets steam escape during the blind bake. If you skip this, the center of your crust puffs up like a tiny little dome, and then your filling cracks when you press it down later.
- Watch Your Fillings vs. Liquid Ratio: This is the biggest rookie mistake! Solids (spinach, leeks, cheese) should fill about half the space, and the liquid custard fills the other half, bringing it up to about 3/4 capacity. If you load up on solids, the eggs can’t fully set evenly. If you put too much liquid in, you get the dreaded run-over we talked about.
- The Temperature of the Tin Matters: When you add the filling to the *pre-baked* crust, make sure your muffin tin itself isn’t piping hot from just coming out of the blind-bake! Let the crusts cool in the tin for five minutes, just to take the edge off before pouring in the room-temperature custard. This slight cooling helps prevent the bottom crust from overcooking while the middle sets.
Follow those three things, and I promise, you won’t have any leftover **muffin tin quiches** because they will disappear the second you set them out!
Frequently Asked Questions About These Mini Quiches
When I first started serving these, I had about 50 questions myself, so I totally understand if you do too! Dealing with any pastry can feel a little intimidating, but honestly, these are so forgiving. I’m happy to answer the things I hear most often. If you have a question not covered here, please feel free to reach out via our contact page!
Can I skip blind baking the crusts?
Oh, sweetie, please don’t! If you want that lovely, crisp base for your **mini quiches**, you absolutely have to blind bake. If you put the wet egg mixture directly into raw dough, the bottom will turn into a dense, soggy mess because the baking time isn’t long enough to cook the bottom before the top is done.
What other cheeses or fillings work well in these?
This recipe is wonderfully flexible! While the feta and Gruyère make phenomenal **spinach and feta appetizers**, feel free to substitute. Gruyère is great, but Swiss or even sharp white cheddar work beautifully. If you’re not into leeks, finely chopped shallots or even caramelized onions are a fantastic stand-in. Just make sure any vegetables you add aren’t loaded with extra water!
Can these be made completely ahead of time and frozen?
Yes, they freeze like a dream! This is a major bonus for true **make ahead breakfast** planning. Bake them completely, let them cool down fully, and then flash freeze them on a baking sheet first. Once they are solid marbles, transfer them to a freezer bag. When you’re ready, you can reheat them straight from frozen in a 325-degree oven for about 18-20 minutes, tented with foil so they don’t brown too quickly.
Why are my muffin tin quiches puffing up in the middle?
That’s usually the steam trying to escape! Make sure you are pricking the bottom of your pre-baked shells thoroughly with a fork—that’s the number one defense. Also, check that you didn’t over-mix your custard; sometimes too much air incorporated when whisking can cause odd puffing during the bake!
Estimated Nutritional Information for Your Mini Quiches
When I’m putting together recipes, especially for folks managing their diet like I do—remember my background in Food Science!—I always want folks to have a good idea of what they are eating. Since these little beauties are perfect for light snacking or as part of a larger platter for a **brunch food for tea party**, the numbers matter.
Here are the estimates, and I have to give you the standard warning: this is just a ballpark figure! The actual nutrition swings a bit depending on the brand of butter or the exact fat content of the heavy cream you choose. But these numbers give you a great baseline for what one of these wonderful **mini quiches** will clock in at.
- Serving Size: 1 quiche
- Calories: 185
- Fat: 13g (Saturated Fat: 7.5g)
- Carbohydrates: 11g (Fiber: 0.8g, Sugar: 1.2g)
- Protein: 7g
See? That’s really reasonable for a savory bite that’s packed with cheese and vegetables. They feel decadent, but they keep you feeling light and ready to enjoy your gathering. That’s what my Nona always aimed for—real food that lets you enjoy the company!
PrintMake Ahead Mini Quiches with Flaky Crust

Prepare these elegant mini quiches ahead of time for a zero-stress brunch or garden tea party. This recipe features a reliable, flaky crust and fresh spring fillings.
- Prep Time: 30 min
- Cook Time: 32 min
- Total Time: 62 min
- Yield: 12 mini quiches 1x
- Category: Brunch
- Method: Baking
- Cuisine: American
- Diet: Vegetarian
Ingredients
- 1 1/4 cups all-purpose flour
- 1/2 teaspoon salt
- 1/2 cup (1 stick) cold unsalted butter, cut into small pieces
- 3 tablespoons ice water
- 4 large eggs
- 1/2 cup heavy cream
- 1/4 teaspoon ground nutmeg
- 1/2 cup chopped fresh spinach
- 1/4 cup sliced leeks, white and light green parts only
- 1/4 cup crumbled feta cheese
- 1/4 cup shredded Gruyère cheese
- Pinch of black pepper
Instructions
- Prepare the crust: In a bowl, mix the flour and salt. Cut in the cold butter using a pastry blender or your fingers until the mixture resembles coarse crumbs. Gradually add ice water, mixing until the dough just comes together. Form into a disk, wrap, and chill for 30 minutes.
- Preheat your oven to 375 degrees Fahrenheit. Lightly grease a standard 12-cup muffin tin.
- Roll out the chilled dough thinly. Use a round cutter slightly larger than the muffin cups to cut out 12 circles. Gently press the dough circles into the prepared muffin cups to form the crusts. Prick the bottoms lightly with a fork.
- Blind bake the crusts for 10 minutes. Remove from the oven.
- Prepare the filling: In a small skillet, sauté the leeks until soft, about 3 minutes. Set aside.
- In a separate bowl, whisk together the eggs, heavy cream, nutmeg, and black pepper until combined.
- Divide the spinach, sautéed leeks, feta cheese, and Gruyère cheese evenly among the 12 pre-baked crusts.
- Carefully pour the egg mixture over the fillings in each cup, filling them about three-quarters full.
- Bake for 18 to 22 minutes, or until the centers are set and the tops are lightly golden.
- Let the mini quiches cool in the tin for 5 minutes before carefully removing them to a wire rack to cool completely.
Notes
- For a make ahead breakfast, you can assemble the quiches completely, cool them, and store them in an airtight container in the refrigerator for up to two days. Reheat briefly before serving.
- If you prefer a richer flavor, substitute half of the heavy cream with half-and-half.
- This recipe works well for spinach and feta appetizers or as a main component for brunch food for a tea party.
Nutrition
- Serving Size: 1 quiche
- Calories: 185
- Sugar: 1.2
- Sodium: 210
- Fat: 13
- Saturated Fat: 7.5
- Unsaturated Fat: 5.5
- Trans Fat: 0.1
- Carbohydrates: 11
- Fiber: 0.8
- Protein: 7
- Cholesterol: 75