
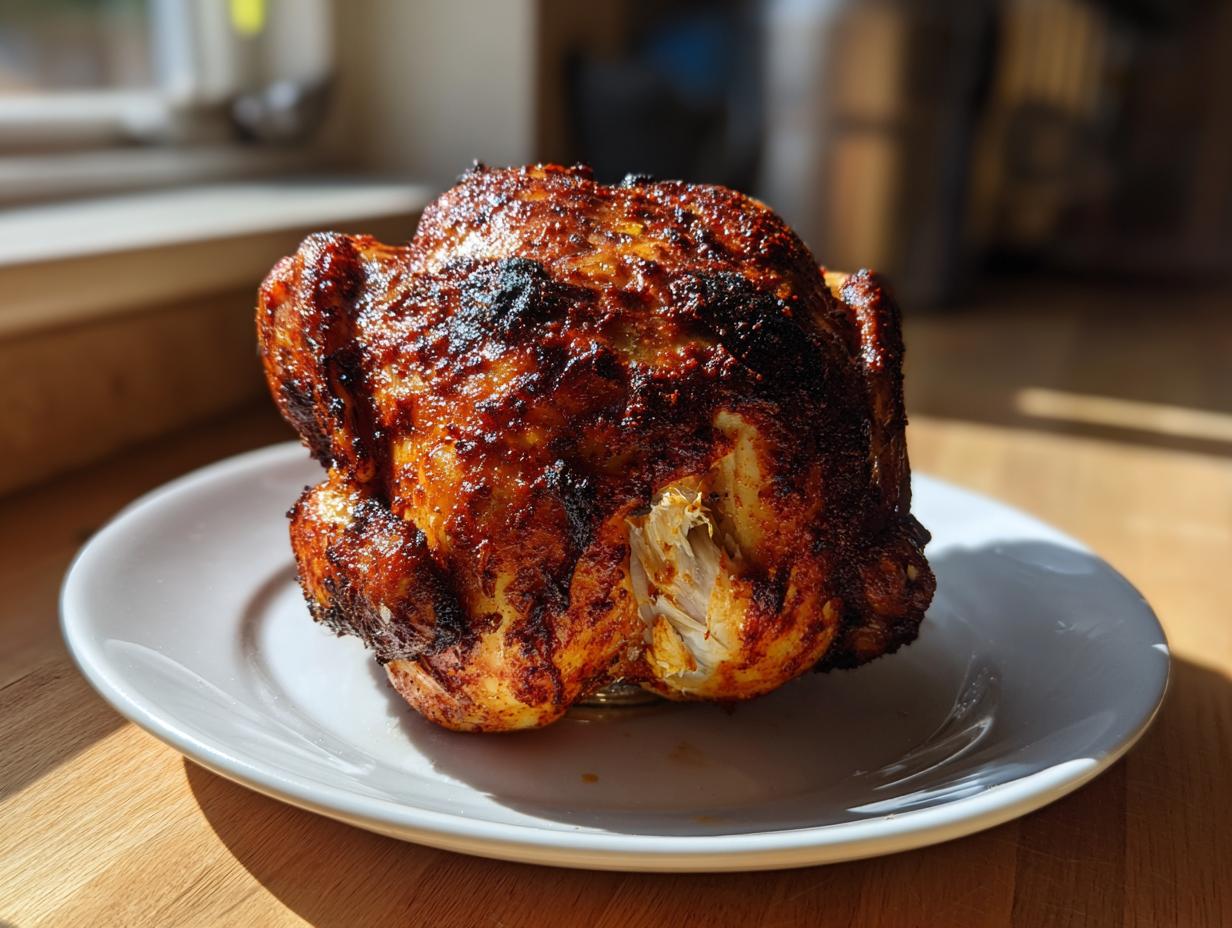
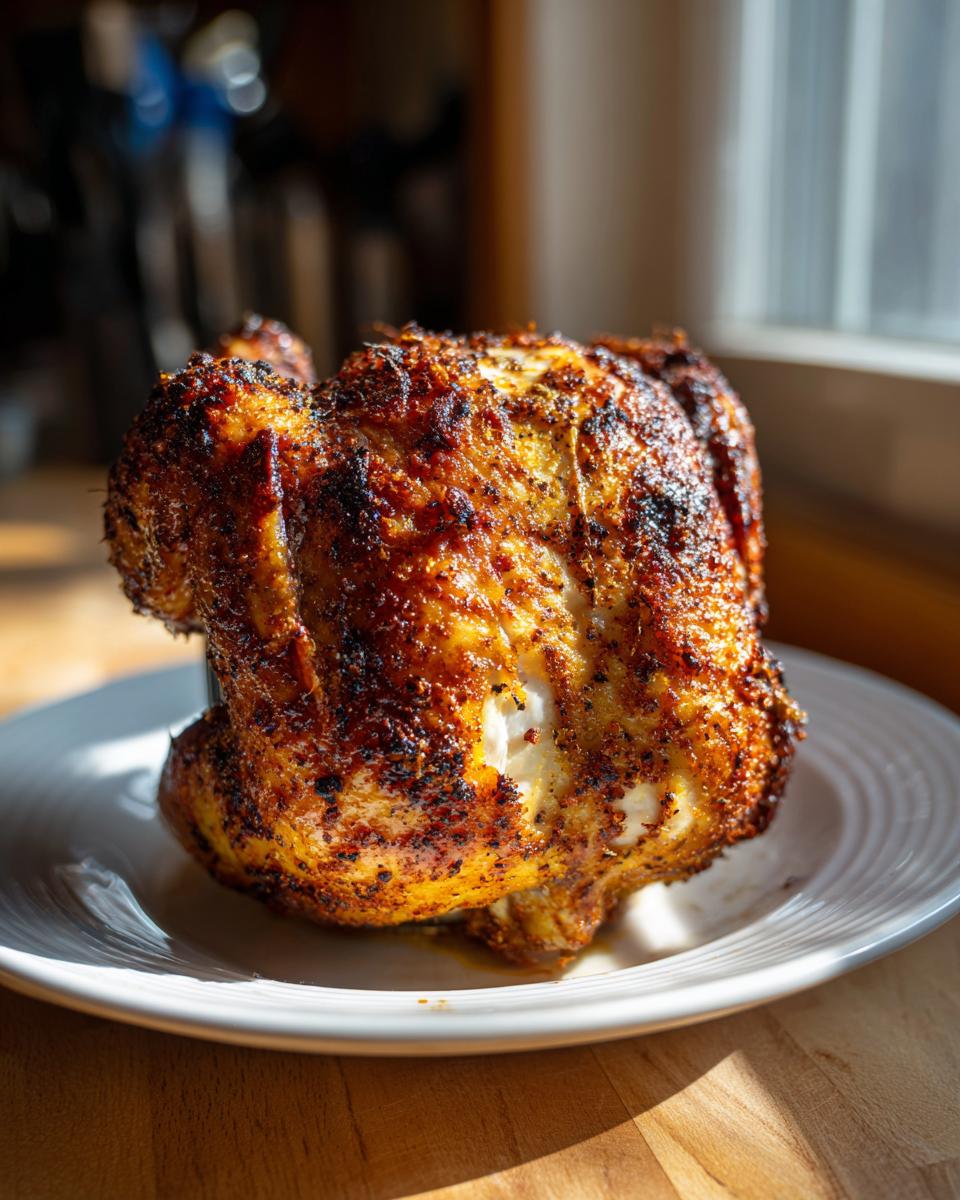
There’s nothing that stops a backyard party dead in its tracks like a whole chicken standing tall and proud on the grill. I’m talking about that incredible spectacle that is beer can chicken! You might think this showstopper requires hours of fuss, but that goes against everything Nona taught me about cooking: flavor over fuss, and less mess is always the goal. This method is surprisingly straightforward, and when you master that indirect heat, you unlock the secret to perfectly juicy meat locked under incredibly crispy, seasoned skin. Trust me, this is the one grilling trick that will make you the talk of every Memorial Day cookout.
- Why This Beer Can Chicken Recipe Delivers Unmatched Flavor and Moisture
- Essential Ingredients for Classic Beer Can Chicken
- Mastering How to Make Beer Can Chicken on Gas Grill Setup
- Step-by-Step Instructions for Perfect Beer Can Chicken Grilling
- Tips for Success When Making Beer Can Chicken
- Serving Suggestions for Your Memorial Day Grill Mains
- Storage and Reheating Instructions for Leftover Beer Can Chicken
- Frequently Asked Questions About Beer Can Chicken
- Share Your Beer Can Chicken Success
Why This Beer Can Chicken Recipe Delivers Unmatched Flavor and Moisture
This upright method isn’t just for looks, folks; it’s pure grilling science! As the beer gently heats inside the bird, it releases fragrant steam right into the cavity. That steam is the absolute magic key to keeping the breast meat unbelievably moist while the exterior grills evenly. This is the kind of practical result Elena loves to see—maximum flavor achieved with minimal stress on your part. We get that beautiful, even golden-brown skin because the heat circulates all around the bird, not just from the bottom up.
If you want to dive deeper into quick, flavor-packed weeknight ideas once you master this technique, check out my guide on simple weeknight dinners.
The Perfect Beer Can Chicken Rub Recipe Components
We can’t just let that fantastic steam do all the work; the outside needs just as much love! This specific beer can chicken rub recipe is my go-to because it balances saltiness with deep color. The paprika isn’t just for show—it brings that gorgeous mahogany crust we’re chasing. And don’t skip the tiny bit of cayenne; it just wakes up your palate without making things spicy. It’s all about simple, honest ingredients creating an incredible payoff.
Essential Ingredients for Classic Beer Can Chicken
Look, Nona always said if the ingredients aren’t top-notch, the final meal is just… fine. And for this showstopper, we need ingredients that deliver every single time. I’ve laid everything out for you below so you aren’t scrambling halfway through prepping your grill station. Remember, we are aiming for show-stopping presentation *and* fantastic flavor here, so make sure you’ve got everything ready to go before you even think about lighting a burner.
- 1 whole chicken (about 4-5 lbs) – Make sure it’s patted absolutely dry later!
- 1 standard 12 oz can of beer (Don’t use low-calorie stuff! A good lager or pale ale works best for the steam.)
- 2 tablespoons olive oil
- 1 tablespoon kosher salt
- 1 tablespoon paprika (This is your color booster!)
- 1 teaspoon black pepper
- 1 teaspoon garlic powder
- 1 teaspoon onion powder
- 1 teaspoon dried thyme
- 1/2 teaspoon cayenne pepper (Only if you want a tiny little kick!)
Mastering How to Make Beer Can Chicken on Gas Grill Setup
Okay, getting this setup right is what separates a good grilled chicken from a truly legendary one! If you’re wondering exactly how to make beer can chicken on gas grill specifically, the secret is managing your heat—we need indirect heat, not direct flame. For most gas grills, this means lighting up only one side, maybe two burners on low, and leaving the other side completely off. That dark side, where the chicken sets, stays cool while the lit side does the hard work.
We want a happy, steady temperature around 325°F. Resist the urge to crank it up! This slow, low cooking ensures that internal temp for whole chicken on grill comes up without burning the beautiful rub we just put on. And listen, be careful handling that can once it’s hot! I always use thick gloves or long tongs when maneuvering the whole assembly because that beer gets volcanic. For more grilled inspiration, check out my recipe for chicken cordon bleu.
Preparing the Chicken and Setting Up the Beer Can Chicken
Before we even think about that grill, that chicken absolutely has to be dry. Pat, pat, pat it with paper towels until it feels like suede! That moisture is the enemy of crispy skin. Once oiled and fully coated in our rub, it’s time for the insertion. Gently pour out half the beer—this stops it from boiling over and making a huge mess inside your grill lid. Then, you carefully slide the can up into the cavity until the bird balances firmly on its two little legs and the can base. It should look like it’s just waiting for the show to start!
Step-by-Step Instructions for Perfect Beer Can Chicken Grilling
Now that we’ve got our grill humming along at that perfect medium-low heat, it’s time for the actual cooking. Remember what I said about Nona? Flavor over fuss! Once this chicken is set up, you walk away! Don’t peek every five minutes; that just lets all that lovely steam escape. We’re looking at about an hour and fifteen minutes, maybe an hour and a half, depending on the size of your bird. Trust the process, and trust your thermometer. While this cooks, maybe you can dream up some sides. If you’re looking for other great grilled ideas, I just posted my amazing grilled steak kabobs!
Once the time is getting close, you carefully lift the lid and check it. The entire assembly will be hot, heavy, and smell amazing, so use long tongs if you need them. The goal is perfect doneness without drying things out, which is where the final rest comes in. Don’t carve it immediately!
Achieving the Correct Internal Temp for Whole Chicken on Grill
This is the most important E-E-A-T step for safety when grilling! You absolutely must know the right internal temp for whole chicken on grill. Insert a reliable meat thermometer deep into the thickest part of the thigh—make absolutely sure you aren’t touching the bone, or you’ll get a false high reading. The moment that thermometer reads 165°F, it’s done. Pull it right off the heat at that exact point.
Tips for Success When Making Beer Can Chicken
I’ve consulted with so many busy people who struggle to get that perfect result when grilling, so let me give you the insider scoop. Rule number one for crisp skin: Do NOT baste this chicken! Basting adds moisture back to the surface, and we fought so hard to dry that skin out. Let the steam do its job internally, and keep that lid closed tight. Also, post-grill handling requires respect—that can is essentially a tiny, sealed oven. Always wear heavy-duty oven mitts or use serious tongs when lifting the chicken off the grates. You want that resting time so the juices settle down before carving. Speaking of sides, these BBQ Baked Beans pair perfectly with that smoky flavor!
Serving Suggestions for Your Memorial Day Grill Mains
Now that you’ve pulled off this incredible showstopper, what are you putting next to it on the plate? Remember, at One Dish Universe, we love flavor without the sink full of pots! For that perfect memorial day grill mains setup, keep the sides simple and bright. A crisp side salad with a sharp vinaigrette cuts right through the richness of the roasted chicken skin. Or, if you’re looking for something truly vibrant, you HAVE to try my watermelon salsa. The cool, sweet fruit is just the most wonderful contrast to that smoky, savory bird. Keep it easy, keep it fresh, and enjoy the moment!
Storage and Reheating Instructions for Leftover Beer Can Chicken
There are always leftovers because this chicken is just that good! First things first: safety. You have to let the chicken cool slightly, and then carefully remove every bit of the can from the cavity. That beer liquid is just residual steam now, so toss it out. Cut your leftover portions and store them tightly sealed in the fridge. When you want to enjoy it again, don’t just blast it in the microwave!
I hate reheating chicken that dries out. Try wrapping the pieces loosely in foil and heating them low and slow in the oven, or even back on the grill on the cool side, just until warmed through. If you want more ideas for reviving yesterday’s amazing meals, take a peek at my tips for leftover magic, like this great leftover meatloaf sandwich recipe.
Frequently Asked Questions About Beer Can Chicken
I get so many emails asking the same things, and that’s okay! When you’re tackling a unique technique like this, you need absolute clarity. We want you grilling confidently, especially when nailing that perfect internal temp for whole chicken on grill. Here are the few things folks always wonder about before they fire up the burners. If you have more unique questions, feel free to reach out via my contact page!
Can I make beer can chicken in the oven?
You absolutely can, but honestly, you miss out on that unbeatable crispy skin we worked so hard for! If the weather is terrible, you can set your oven to 350°F. You’ll need a roasting rack or a special roasting stand—not the actual can, since you can’t put aluminum cans in the oven safely. It will cook through, but it won’t have that signature grilled char.
What if I don’t want to use alcohol in my beer can chicken?
If you aren’t into using beer, don’t you worry for a second! The purpose of the liquid is just to create that moist steam environment. You can easily substitute with 12 ounces of plain chicken broth or even apple juice if you want a little sweetness. Just remember, you still need to open the container and discard or drink about half before inserting it.
Share Your Beer Can Chicken Success
Alright, that’s the whole rundown! You’ve mixed the rub, you’ve set up your indirect heat, and you’ve got yourself a beautiful, sturdy bird ready for its moment of glory. Now, here’s where we connect, just like Nona always wanted us to. I genuinely want to see your results! Did that skin get crispy? Did your neighbors ask for the recipe? Drop a star rating at the top of this page—five stars if you loved serving this showstopper—and tell me all about it in the comments!
Sharing our successes and troubleshootings is how we all learn and keep the joy in the kitchen. When you share your photos or stories, you’re helping keep that spirit alive, reminding us that the best food happens when we cook for people we care about. If you want to learn more about why we approach cooking this way, check out the About Us page. Go fire up that grill!
PrintClassic Beer Can Chicken for the Grill
Make moist, flavorful whole chicken standing upright on your gas grill using this simple technique and dry rub.
- Prep Time: 15 min
- Cook Time: 90 min
- Total Time: 105 min
- Yield: 4 servings 1x
- Category: Dinner
- Method: Grilling
- Cuisine: American
- Diet: Low Fat
Ingredients
- 1 whole chicken (about 4–5 lbs)
- 1 standard 12 oz can of beer (lager or pale ale recommended)
- 2 tablespoons olive oil
- 1 tablespoon kosher salt
- 1 tablespoon paprika
- 1 teaspoon black pepper
- 1 teaspoon garlic powder
- 1 teaspoon onion powder
- 1 teaspoon dried thyme
- 1/2 teaspoon cayenne pepper (optional)
Instructions
- Prepare the dry rub by mixing the salt, paprika, pepper, garlic powder, onion powder, thyme, and cayenne pepper in a small bowl.
- Rinse the chicken inside and out and pat it completely dry with paper towels. This helps the skin crisp.
- Rub the entire surface of the chicken with olive oil, then generously coat it with the prepared dry rub, including the cavity.
- Open the beer can and pour out or drink about half of the liquid. This prevents boiling over.
- Carefully position the chicken upright over the open beer can, inserting the can into the chicken cavity so the chicken rests securely on the can and its own legs/wings.
- Preheat your gas grill to a medium-low heat (around 325°F). You want indirect heat. If your grill has two burners, light only one side.
- Place the chicken assembly on the cool side of the grill (indirect heat). Close the lid.
- Grill for approximately 1 hour and 15 minutes to 1 hour and 30 minutes. Do not open the lid frequently.
- Check the internal temperature using a meat thermometer inserted into the thickest part of the thigh, avoiding the bone. The chicken is done when the internal temp reaches 165°F.
- Carefully remove the chicken and the can from the grill using tongs and heat-resistant gloves. Let the chicken rest on a cutting board for 10 minutes before carving.
Notes
- For best results on a gas grill, position the chicken so the can is directly over a burner that is turned off, using the other side for heat.
- If you do not want to use beer, substitute the liquid with 12 oz of chicken broth or apple juice.
- To ensure maximum crispness, avoid basting the chicken during the cooking process.
Nutrition
- Serving Size: 6 oz cooked meat
- Calories: 350
- Sugar: 0.5
- Sodium: 450
- Fat: 18
- Saturated Fat: 5
- Unsaturated Fat: 13
- Trans Fat: 0
- Carbohydrates: 1
- Fiber: 0.2
- Protein: 45
- Cholesterol: 140